TLDR: Crop or trim marks show where a card is intended to be cut. Registration marks serve a different purpose: they either align printing separations or give compatible finishing equipment targets from which to calculate the sheet’s actual position. Neither type of mark eliminates cutting variation. Bleed protects the outer edge, while a safe area protects important content inside the card.
The practical issue behind crop marks and registration marks in card production is not simply which marks appear in a PDF. It is whether the artwork remains acceptable when printing and cutting move slightly relative to each other. Marks communicate or measure position; bleed and safe-area discipline make ordinary movement less visible.
Crop marks, registration marks and artwork boundaries
| Element | What it does | What it does not do |
|---|---|---|
| Trim line | Defines the nominal finished edge of the card | Guarantee that every physical cut lands exactly on that line |
| Crop or trim marks | Make the intended trim position visible outside the finished piece | Correct sheet skew, scale error or front-to-back movement by themselves |
| Prepress registration marks | Help align color separations during printing | Define the finished card edge |
| Cutter registration targets | Let compatible equipment locate and assess a printed sheet | Replace the equipment’s calibration or the artwork’s bleed |
| Bleed | Extends background artwork beyond the trim line | Protect text or symbols positioned too close to the edge |
| Safe area | Keeps critical content away from the variable cutting zone | Prevent a background from showing an unwanted white sliver at the edge |
Adobe defines trim marks as printer marks indicating where a page should be trimmed. It defines bleed as artwork extending beyond the trim boundary to accommodate trimming inaccuracy. Its PDF documentation also distinguishes registration marks, which are used to align color separations. The terminology matters because a registration target is not merely a more technical name for a crop mark. Adobe’s PDF options documentation provides the underlying prepress definitions.
The three boundaries in a card file
A production-ready card normally needs three conceptual boundaries, even when only one of them is represented by a visible line in the working template.
- The bleed edge is the outermost artwork boundary. Background color, texture and images intended to reach the card edge continue to this boundary.
- The trim edge is the intended finished size. It is the nominal line along which the card will be cut.
- The safe area is an inset region used for text, icons, rules information and other elements that should not risk appearing crowded or being clipped.
These boundaries solve different failure modes. Bleed prevents exposed unprinted material when a cut shifts outward from the artwork. The safe area reduces the chance that important content is clipped or appears visibly off-center when a cut shifts inward. Crop marks identify the intended trim position, but they do not create either protection.
There is no single bleed or safe-area measurement suitable for every card-production method. The allowance has to come from the printer’s template or written specification because press registration, stock behavior, imposition and finishing equipment all affect what is realistic. If a supplier gives separate trim, bleed and safe-area guides, preserve all three rather than replacing them with a generic template.
What crop marks do on a card sheet
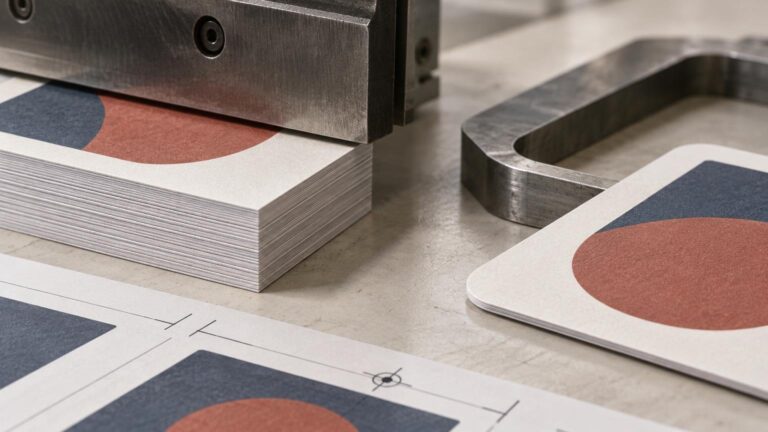
Crop marks are short lines positioned outside the retained artwork. Their extensions point toward the nominal trim boundaries without normally printing across the finished card. On an imposed sheet containing many cards, the marks may describe sheet-level cuts, individual card positions or a cutting sequence, depending on the finishing process.
The important word is nominal. A crop mark tells an operator or machine where the edge is supposed to be. It does not prove that the printed image, reverse image and cutting sheet are all perfectly aligned. A cut can follow its programmed path while the image has shifted slightly on the stock.
Crop marks should not remain on a correctly finished card. If a mark appears at an edge, common possibilities include insufficient bleed, a mark positioned too close to the trim, an incorrect page size, or print-to-cut movement large enough to bring the mark into the retained area.
Visible marks versus PDF trim information
A PDF can carry page-boundary information without drawing visible crop marks into the artwork. That distinction is useful when a commercial printer’s prepress system reads the document boundaries and adds its own marks during imposition. The absence of visible marks therefore does not automatically mean the PDF lacks a defined finished size.
Do not add marks merely because a file is going to print. Many card suppliers want one artwork file per card and handle imposition themselves. In that workflow, user-added marks can interfere with automated placement or be mistaken for printable content. Follow the supplier’s export instructions; add visible crop marks only when the printer or your own cutting workflow requires them.
Registration marks have two different production meanings
Marks for color separations
In conventional prepress language, registration marks are targets used to align color separations. Adobe notes that its special Registration color appears on every ink separation, which is why it is intended for small printer marks rather than large areas of artwork. Using it for a large black card element could create excessive combined ink coverage.
Designers producing ordinary composite artwork rarely need to build these marks manually. They are generally generated through the print or prepress workflow. A black symbol in the card design is artwork; a small target intended to appear on every separation is a production control.
Targets for print-then-cut equipment
Desktop cutters and automated finishing systems can use optically read targets, sometimes also called crop marks or registration marks, to locate printed material. The equipment reads known targets and compares their detected positions with their expected positions before cutting.
The exact correction depends on the machine and target pattern. Roland documents optical marks used to align cutting with printed graphics. Plockmatic describes a four-target system that can determine origin, scale, skew and rotation while also checking for reading errors. These are equipment-readable fiducials, not ordinary trim ticks.
This distinction explains an apparent contradiction: a cutter registration target can help correct print-to-cut alignment, while a conventional crop mark may only indicate the desired trim location. Whether a mark performs an active correction depends on the finishing equipment recognizing that target format.
Why centered artwork can produce uneven card borders
A centered digital file describes the relationship between artwork and the nominal trim box. The physical result also depends on where the image lands on the sheet and where the cutter lands relative to that image. If either position moves, a symmetrical border becomes asymmetrical even though the source file remains mathematically centered.
Thin perimeter borders reveal this movement quickly. Suppose a cut moves slightly to the right. The left border becomes wider while the right border becomes narrower. The total card size may still be correct, yet the imbalance is immediately visible because the eye compares two parallel edges. A full-bleed background with no edge-parallel frame can hide the same amount of movement much more effectively.
Supplier-specific tolerances can be much larger than a designer expects. The Game Crafter, for example, warns that its templates can vary by as much as 1/8 inch, or 3.175 mm, because of printer drift and cutting or registration error. It advises extending bleed and avoiding thin perimeter borders. That figure describes its workflow and must not be treated as a universal card-industry tolerance.
At the other end of the equipment spectrum, Duplo lists ±0.2 mm processing accuracy for its DC-746 and describes registration-mark-based image-drift compensation. That is a specification for a particular machine under its applicable conditions, not a promise for every job produced on one or a general tolerance for cards.
Three card-production examples
A full-bleed card
For a card with an edge-to-edge illustration, extend the background through the supplier’s entire bleed zone. Keep the title, cost icons, rules text and other indispensable elements inside the stated safe area. A small shift may then change the exact crop of the background, but it is less likely to expose an unprinted sliver or clip critical information.
A card with a white or colored border
A border cannot absorb cutting movement in the same way because its width provides a visible reference. Make it wide enough for the supplier’s stated process variation, or avoid a perfectly uniform edge-parallel frame if small differences would be unacceptable. Increasing bleed outside the trim does not preserve an internally printed border’s symmetry; it only provides more printable background beyond the intended edge.
An imposed print-then-cut prototype sheet
When you control both printing and cutting, place cards according to the cutter software’s required layout and use the target pattern specified for that machine. Keep the target area clear, print at the intended scale and avoid export or driver settings that silently resize the page. Optical targets can compensate only for the conditions the system is designed to detect.
If the broader project moves from card-specific preflight into general printing decisions, broader commercial printing resources can help frame the next stage without changing the card artwork requirements described here.
Crop marks do not fix duplex registration
A front and back can each be centered within their own digital trim boxes and still fail to align physically. Duplex registration adds another relationship: the position and orientation of the reverse image relative to the front after the sheet is turned or re-fed. Ordinary crop marks do not measure or correct that relationship by themselves.
For a card with a symmetrical back, a small duplex shift may be especially obvious at the border. Ask the printer about front-to-back registration, not only cutting accuracy. A physical proof should be checked from both sides, with several cards compared rather than relying on one favorable sample.
Who should add the production marks?
The designer should normally establish the correct finished size, extend artwork through the required bleed and keep essential content within the safe area. The printer’s prepress team commonly handles imposition and adds the marks needed for its press and finishing line. In a self-operated print-then-cut workflow, the operator follows the cutter software’s prescribed target system.
The safest rule is simple: do not invent a mark scheme. Use the supplied card template and export preset, or obtain written confirmation about page size, bleed and requested marks. Marks designed for one cutter may be meaningless to another, while manually added marks can create problems when a printer imposes the cards again.
A practical preflight and proof checklist
- Confirm the exact finished card size and document orientation.
- Use the printer’s current template rather than transferring allowances from another supplier.
- Extend every edge-to-edge background through the full specified bleed.
- Keep text, icons, frames and other critical elements within the stated safe area.
- Treat narrow symmetrical borders as tolerance-sensitive design elements.
- Add crop marks only when the printer or your own finishing workflow requests them.
- Use the exact optical target pattern required by compatible print-then-cut equipment.
- Export at the requested page size and check that no print setting scales the sheet.
- Ask separately about cutting tolerance and front-to-back registration when both affect the design.
- Inspect a physical proof or early production sample for exposed edges, clipped content, border balance and front-to-back centering.
- Check the cut edge itself. Alignment can be acceptable while a worn blade or unsuitable cutting setup creates roughness; use the guide to diagnosing burrs on cut card edges if the edge is raised or ragged.
The useful takeaway
Use crop marks to communicate the intended edge only when the workflow asks for them. Use registration targets when the press or finishing equipment is designed to read that specific target system. Then design for the physical process: carry backgrounds through the specified bleed, keep critical content in the safe area and avoid narrow perimeter borders when the supplier’s tolerance cannot preserve them consistently.
The marks identify or measure position. They do not make cutting variation disappear. The most reliable next step is to obtain the printer’s template, confirm who performs imposition and mark generation, and judge a physical proof by edge coverage and border consistency rather than by the apparent precision of the PDF alone.