TLDR
What causes burrs on cut card edges? In knife-based guillotine or stack cutting, the usual cause is a failure to shear the complete card construction cleanly while holding every sheet immobile and fully supported. A dull or damaged knife is the first variable to inspect, but unsuitable clamping, excessive stack movement, incorrect blade engagement, a worn cutting stick, and the card’s layered construction can produce similar symptoms.
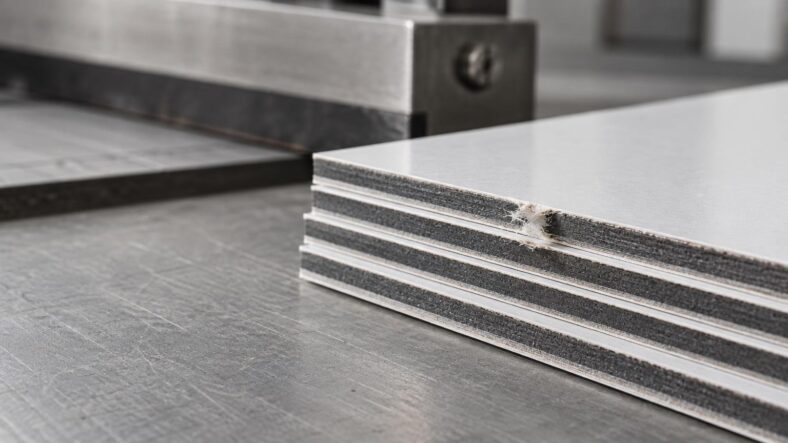
A card-edge “burr” is not necessarily a metal fragment left by the knife. In card production, people often use the word for any raised ridge, fuzzy fiber, rolled coating, lifted surface layer, or incompletely severed material along the edge. The shape and location of that defect can help identify the failing part of the cutting process.
What causes burrs on cut card edges during guillotine cutting?
A guillotine cut depends on three things happening together: the knife must be suitable and sharp, the stack must remain controlled, and the blade must complete its travel against a properly set supporting surface. If any part of that relationship is wrong, the knife may compress or drag the material before severing it.
Commercial cutter troubleshooting guidance associates dull knives with rough, ridged, or turned-down edges. The same guidance identifies clamping, stack characteristics, and paper variability as relevant controls rather than treating every rough edge as a blade problem. This commercial paper-cutting troubleshooting guide provides a useful overview of those interacting variables.
This diagnosis applies primarily to straight knife-based trimming. Die cutting, rotary cutting, laser cutting, and small home trimmers create different contact conditions. A chipped die-cut corner, for example, should not automatically be blamed on the same settings that would explain a fuzzy guillotine-trimmed edge.
1. The knife is dull, nicked, or unsuitable for the construction
Knife condition is the sensible first check because the cutting edge initiates the defect. A sharp, correctly fitted knife shears through the face coating, printed sheet, core, and reverse surface in a controlled pass. A dull edge applies more compression before the material separates. That can push fibers downward, turn a ridge toward the exit side, or leave a fuzzy edge instead of a crisp one.
A nick can create a more localized pattern. If the same narrow defect appears at a consistent position across many cards or sheets, inspect whether it corresponds to one point along the knife. By contrast, roughness distributed across the entire cut is more consistent with a general knife, clamping, stack, or material interaction. These patterns are diagnostic leads, not proof on their own.
Knife geometry and fitting also matter, but they are machine- and material-specific. The correct response is not to copy a grind angle or adjustment from an unrelated cutter. Check the machine manufacturer’s procedure and have a trained operator assess knife condition, fitting, and alignment.
2. The stack moves or deforms under the knife
The clamp has to stop the lift—the stack loaded for one cut—from shifting as the descending knife applies lateral and downward force. Insufficient or unsuitable clamping can let sheets creep, fan, bow, or distort during the cut. Pre-clamping and clamp pressure are material-dependent controls on commercial cutters.
Too little control can produce a lip or feathered edge because the sheets are not cut at identical positions. Excessive or poorly distributed pressure can also mark or distort sensitive surfaces. The practical target is not “maximum pressure”; it is enough uniform control for that construction without crushing, embossing, or damaging it.
Stack height changes the problem. A taller lift contains more interfaces where trapped air, curl, waviness, coating slip, or caliper variation can affect how sheets sit. A lower test lift is therefore useful during diagnosis. If a small lift cuts cleanly but a production-height lift does not, investigate stack control and lift preparation before concluding that the stock itself is defective.
3. Blade depth or the cutting stick prevents a complete cut
The cutting stick is the replaceable surface beneath the stack that receives the knife at the end of its stroke. Blade depth and engagement with that stick affect whether the bottom of the lift is severed consistently.
If the knife does not complete the cut cleanly, the lowest cards may retain attached fibers or show tearing where the operator or machine separates them afterward. A deeply grooved, damaged, incorrectly positioned, or unsuitable cutting stick can also create inconsistent support beneath the cut line. If bottom cards are distinctly worse than top cards, blade engagement and the condition of the supporting stick deserve attention.
Do not turn that observation into an improvised instruction to increase blade depth. Too much engagement can damage the knife or machine, while work around powered guillotines presents serious hazards. Knife changes and internal adjustments should follow the manufacturer’s instructions and be handled by trained, authorized people. WorkSafe’s guidance on paper-cutting guillotines explains the significant machinery risks involved.
4. The card construction resists a clean shear
“Cardstock” does not describe one cutting behavior. Two sheets with the same basis weight can have different caliper, density, stiffness, fiber structure, coatings, laminates, or multi-ply construction. Those properties should be examined separately.
- GSM is mass per unit area. It does not provide a universal prediction of thickness, stiffness, or cutting behavior.
- Caliper is the measured thickness of the finished sheet or card. A thicker lift changes the physical cutting geometry, but thickness alone does not reveal density or toughness.
- Stiffness describes resistance to bending. It is influenced by thickness, fiber structure, orientation, layers, coatings, and other construction details.
- A coating or laminate creates a surface layer with its own response to compression and shear. It may stretch, chip, lift, or form a visible lip if the cut is poor.
- The core affects opacity and internal structure, but a core color or marketing name does not by itself diagnose an edge defect.
POLAR’s cuttable-material guidance treats playing cards as a distinct material category and provides material-specific recommendations. That supports a practical point: card constructions should not automatically be cut using assumptions developed for ordinary text paper.
If you are specifying a custom deck, start with the finished construction rather than GSM alone. Record the board, caliper, coating or laminate, core structure, grain direction where relevant, and production sequence. Our guide to proxy and custom card thickness explains why nominal weight and finished caliper are not interchangeable.
The same distinction matters when buying printed invitations and enclosure cards. A clean sample made from one uncoated board does not establish how a laminated or heavily coated version will trim. Approval samples should use the intended finished construction whenever edge quality is important.
Use the defect pattern as a starting point
| Observed pattern | First variables to inspect | What it may indicate |
|---|---|---|
| Fuzziness across most of the lift | Knife condition, clamping, stock fibers | Compression or tearing instead of a clean shear |
| Raised or turned-down ridge | Knife sharpness, knife fitting, stack movement | Material displaced toward the exit side of the cut |
| Bottom cards worse than top cards | Blade engagement, cutting stick, lift height | Incomplete support or severing near the bottom of the lift |
| One section of every edge is rough | Localized knife damage, alignment, support | A nick or setup problem at a repeatable machine position |
| Surface film or coating lifts | Knife condition, laminate bond, construction, cut sequence | The surface layer is stretching or separating before severing |
| Corners are chipped or crushed | Cutting method, die condition, pressure, handling | A die-cutting or transport issue rather than straight trimming alone |
Inspect several cards from known positions in the lift. Looking only at the top card can hide an engagement problem at the bottom; looking only at loose cards can hide a repeatable position within the stack. Keep the top, middle, and bottom samples separated until the pattern is understood.
How to separate a cutter problem from a stock problem
Change one variable at a time. If the knife, clamp setting, lift height, cutting stick, and material all change between tests, a cleaner result will not tell you what fixed it.
- Confirm the defect appeared during cutting rather than packing, transport, corner rounding, or handling.
- Prepare a small, square test lift from the actual finished card construction.
- Use a known-sharp, correctly fitted knife assessed under the cutter manufacturer’s procedure.
- Apply material-appropriate clamping and check that the lift is flat, aligned, and not trapping excessive air.
- Verify the cutting stick and blade engagement through the machine’s approved setup procedure.
- Make the cut and retain identified samples from the top, middle, and bottom of the lift.
- Inspect both faces and the cut edge under consistent light. Note whether fibers, coating, laminate, or the full card body is displaced.
- Repeat while changing only one controlled variable, such as lift height or clamp setting.
A reference material can help, provided it is used carefully. If a known stock cuts cleanly under the same approved setup while the production stock does not, construction becomes a stronger suspect. If both materials show the same repeatable defect, the knife or cutter setup becomes more likely. The comparison is strongest when dimensions and cutting conditions are kept as consistent as practical.
When the cutting method is not a guillotine
A die-cut card is separated by a shaped cutting rule rather than a straight knife passing through a lift. Chipped or crushed corners can therefore point toward die condition, pressure, packing, stripping, registration, or transport through the converting process. Rotary systems add their own clearance and wear variables. Laser cutting can leave heat-affected discoloration or residue rather than a mechanically rolled fiber edge.
Small craft trimmers and manual lever cutters also deserve separate treatment. Their blade support, clearance, pivot geometry, and sheet-holding ability may differ greatly from a production guillotine. If roughness appears only on a home-cut prototype, reproducing it on a properly maintained production cutter is more informative than assigning the defect to the cardstock immediately.
Do not repair the edge before identifying the cause
Sanding, burnishing, scraping, or coating a rough edge may change its gloss, expose the core, round the profile, or make cards inconsistent within a deck. It can also erase the evidence that would have shown where the cutting process failed. Keep representative defective samples intact until the knife, stack position, and production conditions have been reviewed.
The practical takeaway
Start with knife condition and stack control, then check blade engagement and the cutting stick before blaming the cardstock. Run a small test lift from the real finished construction, inspect cards from the top, middle, and bottom separately, and change one variable at a time. That sequence turns a vague complaint about “rough edges” into a traceable cutting-tolerance problem—and avoids trying to polish away a defect that the cutting process will simply create again.